Thursday, March 31, 2011
Tea!
Tea just goes with cake. Or pastry, cookies, bars... if it's not coffee, it's tea.
Here's my bit of shameless promotion:
Look to the right-hand side of your screen, there is a Steeped logo. My mother sells this tea, and I don't feel I'm biased at all when I say it is insanely good. Their after-eight tea, for instance, I pinched out of the bag and chewed on for a while. You know, because I'm odd like that. And it was good that way.
These are high quality but affordable teas. Nothing in a bag, these are all loose teas, as far as I know. They smell good, they taste good, some of them are even good for you. Let me give you a run-down on some of the more interesting flavours:
Cherry and Rose Sencha - sencha green tea, rose petals, natural flavours
This smells and tastes amazing. I love cherry, and this is just beautiful - fragrant and delicate.
Superior Snow Cap - green tea, meringue bits, green currants, rose buds, orange edges, cardamom, cloves, natural flavour
I have not tried this one myself, but it sounds amazing.
Don't Worry Be Happy - chamomile, peppermint, licorice root
Feminini-tea for Women - cinnamon bark, apple pieces, red bush leaves, ginger pieces, raspberry leaves, fennel, chamomile, cardamom, lady's mantel, cloves, orange peel, St. John's Wort, black pepper, juniper berries, silver weed, natural flavour
Masculini-tea for Men - apple pieces, cinnamon bark, red bush leaves, ginger, bean pods, mistletoe, lemon grass, sea holly, cardamom, lemon peel, cloves, black pepper, ginseng root
Sinful Seduction - roasted chicory, chocolate pieces, cocoa pieces, red peppercorns, ginger peices, natural flavour
There is a weight-loss Oolong, sampler packs that include things like a wellness sampler, black tea, green tea, white tea, etc. There's also an entire section of flowering tea balls, which are just nifty to look at. If you've never seen such a thing, you should. A few years back, my old boss brought back some flowering tea balls from China. Jasmine, I think. You put them into a glass teapot, and literally watch them flower in the water. Very pretty.
Then there is a whole line of accessories, tea balls, tea pots, iced tea jug, kettles, cups, you name it.
I have never bought a single item from this company, because I don't have to. My mother is a consultant (and lives with me). But if it wasn't already in my home, I would buy it, and believe me when I say that I am not sales-ploying anyone just for the heck of it. These really are great products.
This is a Canadian company, and because of that, the legalities of shipping to the US need some ironing out. But if anyone is looking from within Canada and is a tea drinker, I'd encourage you to give this stuff a try. I highly doubt you'll regret it.
Mocha, Apple, plus Chocolate Biscotti
I have no pictures yet, she took the pictures and I need to retrieve them. But like I said, I literally have the memory of a goldfish so I'd better get out the details while they're still rattling around in my brain somewhat.
To clear up any confusion, I made two kinds of cupcakes. It's not mocha and apple together, though the more I think about it the more I think that might be good.
I made a mocha cupcake, similar in looks to the previous coffee one - but more, shall I say, cost effective. There is no ganache or cream. The effect is about the same, looks-wise, but probably less rich. The night before I made mini chocolate biscotti, which I used as a garnish. So I'd suggest, if you're doing it, do these first and get them out of the way. They will keep up to 2 weeks in an airtight container, you won't even need half of them for these cupcakes and they go great with coffee.
Chocolate Biscotti
Recipe found here.
50 to 60 cookies
Use a good-quality cocoa powder. You can use natural or Dutch-process for these, whichever one you like. Just remember that the chocolate flavor of the finished cookies is dependent on the quality of cocoa powder you use. So it’s worth using a decent one. I used Valrhona. See notes below on ingredients.
If you like extra-crisp biscotti, you can flip each one over midway during the second baking, in step #6. I sometimes smear one side of the cookies with melted dark chocolate. When dipped in a warm espresso, I can’t imagine anything better.
For the biscotti
- 2 cups (280g) flour
- 3/4 cups (75g) top-quality cocoa powder
- 1 teaspoon baking soda
- 1/4 teaspoon salt
- 3 large eggs, at room temperature
- 1 cup (200g) sugar
- 1 teaspoon vanilla extract
- 1/2 teaspoon almond extract
- 1 cup (125g) almonds, toasted and very coarsely-chopped
- 3/4 cups (120g) chocolate chips
For the glaze
1 large egg
2 tablespoons coarse or crystal sugar (see Notes)
1. Preheat the oven to 350F (180C) degrees.
2. In a small bowl, sift together the flour, cocoa powder, baking soda, and salt.
3. In a large bowl, beat together the 3 eggs, sugar, and vanilla & almond extracts. Gradually stir in the dry ingredients, then mix in the nuts and the chocolate chips until the dough holds together.
4. Line a baking sheet with parchment paper or a silicone mat. Divide the dough in half. On a lightly floured surface, roll the dough into two logs the length of the baking sheet. Transfer the logs onto the baking sheet, evenly spaced apart.
5. Gently flatten the tops of the logs. Beat the remaining egg and brush the tops of the logs liberally with the egg. (You won’t use it all). Sprinkle the tops with the coarse or crystal sugar and bake for 25 minutes, until the dough feels firm to the touch.
6. Remove the cookie dough from the oven and cool 15 minutes. On a cutting board, use a serrated bread knife to diagonally cut the cookies into 1/2-inches slices. Lay the cookies cut side down on baking sheets and return to the oven for 20 to 30 minutes, turning the baking sheet midway during baking, until the cookies feel mostly firm.
Once baked, cool the cookies completely then store in an airtight container for up to two weeks. If you wish, the cookies can be half-dipped in melted chocolate, then cooled until the chocolate hardens.
Notes:
- I did not use the glaze at all, I didn't have any coarse sugar. I don't know that it's necessary, but might be a nice touch.
- I made 4 logs out of this, not 2 - since mine were mini. For the purpose of this cupcake they need to be small. But if you like larger biscotti, I'd suggest you break into 2, make one regular log and two of of the remaining half.
Okay! On to...
Mocha Cupcakes
Recipe found here.
- 2 eggs
- 1/2 cup cold brewed coffee
- 1/2 cup canola oil
- 3 teaspoons cider vinegar
- 3 teaspoons vanilla extract
- 1-1/2 cups all-purpose flour
- 1 cup sugar
- 1/3 cup baking cocoa
- 1 teaspoon baking soda
- 1/2 teaspoon salt
In a large bowl, beat the eggs, coffee, oil, vinegar and vanilla until well blended. In a small bowl, combine the flour, sugar, cocoa, baking soda and salt; gradually beat into coffee mixture until blended.
Fill paper-lined muffin cups three-fourths full. Bake at 350° for 20-25 minutes or until a toothpick comes out clean. Cool for 10 minutes before removing from pan to a wire rack to cool.
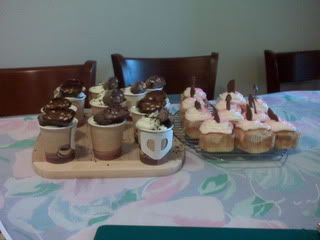
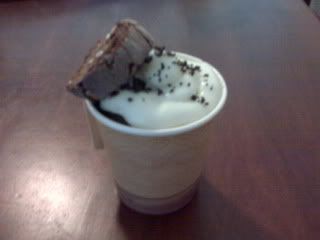
I baked these, like I said, in the coffee cups. The link has a mocha frosting, I didn't use it - I used strictly butter-cream that I piped on. On the top I put the chocolate crunch sprinkles again, and then a biscotti at edge of the cup on each one.
For the apple cupcakes, I used my apple cake recipe that can be found here.
Then I made a caramel apple filling that unfortunately you are not going to get exact measurements on, but I'll do my best.
Filling
- 3 apples, diced (I used Gala apples, Granny Smith would probably be better)
- 1/4 cup plus a handful of white sugar
- 2 or 3 tbsp lemon juice
- 1 tsp cinnamon
- 1 1/2 tsp (or so) pumpkin pie spice*
- 1/4 to 1/2 cup butter
- 1/4 cup water
- 3 tbsp flour
*Failing pumpkin pie spice, use a dash of ginger, clove, nutmeg and cinnamon
Put all the ingredients in a saucepan and heat to boiling, stirring frequently. Keep boiling until the mixture thickens and caramelizes, the colour will turn dark. Remove from heat and cool. It will be syrupy, not hard or very thick. Set aside.
Apple Cake
- 2 1/4 cups cake flour (all purpose can be used, I didn't have cake flour)
- 1 cup sugar
- 1/2 cup powdered apple cider mix (or 3 individual pouches)
- 3/4 cup shortening
- 3/4 cup milk
- 3 eggs
- 2 1/2 tsp baking powder
- 1 tsp salt
- 1 tsp vanilla extract
- 1/2 tsp rum extract (or 1 tsp rum)
I substituted almond extract for rum this time, and butter for shortening. Same measurements.
Preheat oven to 375*F. Prepare pans; first grease and then flour two 9-inch round cake pans.
Into a large mixing bowl, measure all ingredients except frosting and jelly.
With mixer at low speed, beat until well mixed, scraping bowl with a rubber spatula. Increase speed to medium; beat 5 minutes, occasionally scraping the bowl.
Drop one full spoonful into each cup of a paper-lined cupcake pan. Cover with 1 tsp of caramel apple sauce, try to get more apple and less sauce. Drop one more spoonful of batter over each to cover.
Bake at 375* for about 20 minutes, or until browned. Cool 5 minutes in the pan, then turn out onto cooling racks.
I ended up with about 18 cupcakes out of this recipe.
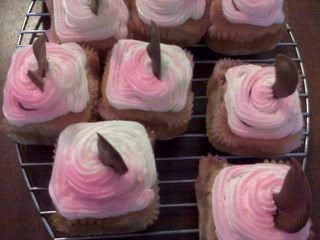
When they cooled, I piped butter-cream on them, sprayed with pink, and garnished with chocolate pieces I'd made.
That's it, that's all - I'll add photos when I have them!
Edit: And now I have them. Here they be, enjoy.
Saturday, March 26, 2011
Chocolate Coffee Cupcakes/Lemon Crunch Parfait
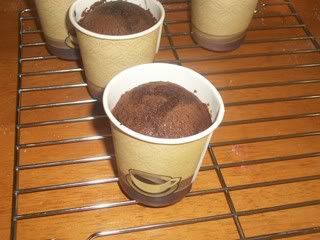
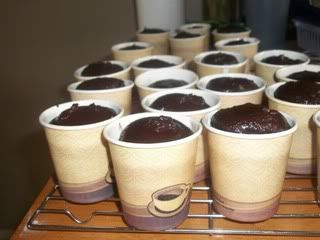
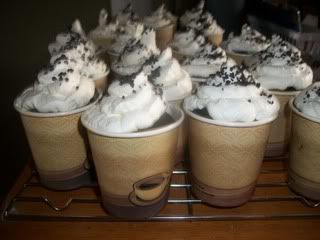
The first one is a coffee chocolate cupcake. I found the recipe here. I decided I wanted to make them in coffee cups, and I searched high and low - everywhere I went the cups were plastic, too big, made for water... whatever. Dollar store to the rescue! I found these cute little coffee cups, about espresso-shot sized, 20 for a buck. I bought 100. I plan to keep doing this.
Untrue to form, I'll give you the pictures first.
Now that that's out of the way, here's the recipe:
Chocolate Coffee Cupcakes
1/2 cup plus 2 tablespoons milk
6 tablespoons unsweetened cocoa powder
1/4 cup instant coffee powder
1 1/2 cups cake flour
1/2 teaspoon baking soda
1/4 teaspoon salt
12 tablespoons unsalted butter -- at room temperature
1 cup plus 2 tablespoons granulated sugar
1/2 teaspoon vanilla extract
3 large eggs
3 cups heavy cream
1/3 cup coffee beans -- crushed
8 ounces milk chocolate -- finely chopped
2 cups mascarpone cheese
1/4 cup confectioners' sugar -- sifted
To make the cupcakes:
Preheat the oven to 350 degrees F. Line 30 standard muffin cups with paper liners.
Combine the milk, cocoa, coffee and 1/4 cup water in a small saucepan and bring to a boil, constantly whisking, until the cocoa and coffee have dissolved. Let cool and pour into a liquid measure.
Sift together the flour, baking soda, and salt. In the bowl of a mixer, cream the butter, sugar, and vanilla on medium speed until light and fluffy. Add the eggs, one at a time, mixing well after each addition. With the mixer on low speed, add the dry ingredients alternately with the milk mixture in three batches, ending with the liquid. Fill each muffin cup halfway with the batter. Bake 18 to 20 minutes until a toothpick inserted into the center comes out clean. Remove the cupcakes from the pan and let cool completely on a wire rack.
To make the mocha ganache and mascarpone cream:
Combine 1 cup of the heavy cream and coffee beans in a small saucepan and bring to a boil over high heat. Remove from the heat, cover, and let infuse for 10 minutes. Strain through a fine-mesh sieve into a clean sauce-pan and bring back to a boil. Put the chocolate in a medium bowl and pour the hot cream over it, stirring slowly, until the ganache is smooth. Spoon enough ganache over each cupcake to fill the liners to the rim.
Using a whisk or in the bowl of a mixer fitted with a whisk attachment, whip the remaining 2 cups of heavy cream to stiff peaks. Add the mascarpone and confectioners sugar and whisk until smooth. Spoon the mascarpone cream into a pastry bag fitted with a medium round tip and pipe the cream on top of the ganache in a circle.
Notes:
- This says it makes 30 cupcakes, in my cups it made 20.
- I didn't have marscapone cheese, I substituted cream cheese and it worked just fine.
- I made chocolate covered plastic spoons to serve with - I won't bother to include instructions on that unless anyone asks.
- Chocolate crunch on top again, cocoa could be used, sprinkles, whatever. Play, experiment, have fun.
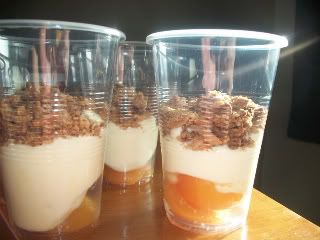
On to the parfait. This was surprisingly simple, and it looks simple, but it tastes SO good.
Shyah my cups were too big. Next time I'd get smaller ones. And I just realized I can see myself reflecting in them, haha.
Lemon Crunch Parfaits
Makes 6 servings
1/4 cup whipping cream
1 can apricot halves in light syrup, drained
Lemon Curd:
3 egg yolks
1 egg
1/2 cup and 1 tbsp granulated sugar
1 tsp finely grated lemon rind
1/2 cup lemon juice
pinch salt
Almond Crunch:
1/4 cup all-purpose flour
2 tbsp large-flake rolled oats
1 tbsp packed brown sugar
2 tbsp butter
2 tbsp slivered almonds
Almond Crunch: In bowl, stir together flour, oats and brown sugar. Using pastry blender, cut in butter until crumbly. Stir in almonds. Spread on parchment paper-lined baking sheet, bake in 350*F (180*C) until golden and crisp, 12 minutes. Cool.
Lemon Curd: In heatproof bowl, whisk together egg yolks, egg, sugar, lemon rind, lemon juice and salt. Place over saucepan of simmering water; cook, whisking often, until thick enough to coat a spoon, 8-10 minutes. Strain through a sieve into a bowl. Place plastic wrap on surface. Refrigerate until cold and set.
Loosen curd with spoon. Whip cream; fold half into curd. Fold in remaining cream.
Divide apricots among glasses; divide lemon mixture over top. Sprinkle almond crunch over each.
So-o-ooo, that's my desserts for the day. Good stuff, both most likely things I will make again. Hope everyone else makes and enjoys them too. ^^
Monday, March 21, 2011
Aw man...
Having just woken up I was leafing through a magazine of my mothers that'd just come in the mail. Folded over to fit in the mailbox, I read ________ Living. Which I automatically assumed to mean "Canadian Living", because, y'know, we're Canadian. Somewhere around page 3, I find this Jelly Belly $10,000 Cupcake Challenge.
ooOOooOOoo
My eyes light up, and look like O.O!
So exciting! I love jelly belly's. AND I love cupcakes. It's so perfect!
Then I read:
"Open to legal residents of the 50 United States who are 13 years of age and older..."
Wait, what? I keep reading for the "AND CANADA" but it doesn't materialize. Finally I say to myself, "Well that's just stupid, why would they run an American contest in a Canadian...." *flip to the cover to read "Country Living* "....oh."
Well, regardless, there are some nifty decorating ideas in there AND I happen to know that maybe some American friends might read this, so check this:
Jelly Belly Cupcake Challenge
I am still rooting through all the cupcakes on there and I probably will make one or two of them, especially with Easter coming up.
So check it out, no matter where you're from, it's pretty nifty.
Wednesday, March 16, 2011
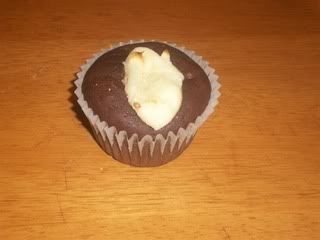
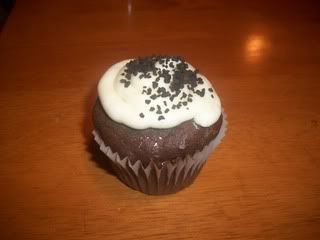
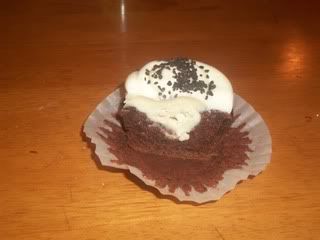
Cream Cheese Crater Cupcakes
Regardless I have the solution.
I made these yesterday, they came out of a little booklet I got with a Canadian Living magazine. There was no image and no frosting/decorating involved in the recipe, so I made all that up myself.
This says it makes 12 cupcakes. I doubled it and got maybe 18, so I'm not too sure... maybe they made puny cupcakes. I do no such thing.
Cream Cheese Crater Cupcakes
Makes 12 cupcakes (apparently)
- 1/3 cup (75 mL) boiling water
- 1 tsp (5 mL) instant espresso powder
- 2 oz (60 g) bittersweet chocolate, chopped
- 1/4 cup (60 mL) buttermilk
- 1/4 cup (60 mL) unsalted butter, softened
- 2/3 cup (150 mL) granulated sugar
- 1 egg
- 1/2 tsp (2 mL) vanilla
- 1 cup (250 mL) all-purpose flour
- 1/3 cup cocoa
- 1/2 tsp baking powder
- Pinch salt
Filling:
- 1/2 cup (125 mL) cream cheese, softened
- 1/4 cup (60 mL) granulated sugar
- 1/4 tsp (1 mL) vanilla
FILLING: In bowl, beat cream cheese, sugar and vanilla; set aside.
In small bowl, whisk boiling water and espresso powder into chocolate until smooth. Let cool slightly. Stir in buttermilk.
In large bowl, beat butter until light and fluffy; gradually beat in sugar. Beat in egg and vanilla.
In separate bowl, whisk together flour, cocoa, baking soda, baking powder and salt; beat into butter mixture alternately with chocolate mixture, making three additions of dry ingredients and 2 of chocolate.
Divide evenly among 12 paper-lined muffin cups. With a spoon, make indentation in center of each. Spoon about 1 tbsp (15 mL) filling into each.
Bake in 350*F (180*C) oven until tops are firm to the touch, about 20 minutes. Let cool.
Notes:
- I thought I had chocolate, turns out my youngest ate it all (except what he dumped on the floor, joys of parenting and all). So I used cocoa, and I found this handy conversion on using cocoa for chocolate: Cocoa/Chocolate Conversion. In my recipe I used the formula for semi-sweet chocolate. Their steps yield 6 oz of chocolate equivalent. This recipe calls for 2, but I doubled it. So if you want to make this substitution, use 3 tbsp cocoa, 2 1/4 tbsp sugar and 1 tbsp shortening (or butter) for each 2 oz.
- I found my cupcakes a tad dry for my liking, not crumbling dry, but I would've liked a bit more moisture. I'm not sure if it's that I left them in a minute too long or because of my chocolate substitution, but I feel like if you use real chocolate you might get a moister cupcake.
- This batter comes out sort of like store-bought whipped frosting in consistency. It's more elastic though. When I was making the indentations I found the way to do it was to first use the back of the spoon to smooth the batter out (it won't simply fall into place in the paper cup). Then tilt it up at about a 45 degree angle, still using the back of the spoon, twirl in a circle in the center of the cupcake. It'll push the batter out toward the edges and create a well. If I didn't smooth the batter out first this worked horribly.
- Finally - after making these, I think that in the future I might actually put the filling right in the center. Fill the cups halfway, put a dollop of filling in the center, fill the rest of the way. I think it'd work much the same but leave the tops smoother, and the filling more central. Just my thought.
Once the cupcakes have cooled, I piped butter-cream on them and coated with chocolate crunch sprinkles. They're really good, these sprinkles, by Wilton. The butter-cream I made had rum extract in it rather than vanilla, and it was quite good. This is a very rich cupcake, lots of flavour, so I found the butter-cream lightened it up some.
Picture time!
Tuesday, March 8, 2011
It's TUESDAY! And that means...
I have been doing *zip* in the kitchen. But having started this blog I'm (if it was even possible) even more obsessed with baked things. Bad thing? Good thing? I don't know, I'm just rollin' with it.
So in order to keep things moving along in this, my very own testament to insanity and sugar addiction, I've gone and dug up some things that I just think are dang cute. Seriously, I ONLY found the pictures, you want back story or directions, you're in the wrong place.
I have no idea what this is about, but I seriously want one:

It looks adorable. I like to imagine it tastes like a mouthful of fruit loops. For all I know it could just be multi-colored, and let me be the first to say, that would be lame. I'd still eat it though.
Next!

Those butterflies don't look awfully edible, and if that's the case, again I say: lame. But regardless, they are pretty, and even those aside I think the decorating is just lovely.
This next one is a little bit different, it's something that I think most bakers overlook - the paper around the cupcake. This is a nifty reminder that all the decorating doesn't need to be sugar upon sugar and fat heaped on top.

I'm not real big on seashells meself, but I like the concept.
Here's a prettier (in my oh-so-humble..andright... opinion) wrapper:

And then I see:

How awesome is that. I want one for myself. It has literally nothing to do with food at all except that it resembles food, but seriously, I'd wear it. Nothing like being proud of being a giant dork, right? Okay, okay, I probably wouldn't really wear it. But I still like to imagine I might.
And this is just blinkin' fantastic:

So there's my random post for the week. Eye candy. Win.
Sunday, March 6, 2011
Mint Kiss Cupcakes
The cake itself is a simple sponge, and everyone seems to like it (I got it from my friend Jackie, so credit is given where credit is due) and it's nearly as fast to make as a mix. Plus it tastes 100 times better. She calls it shortcake, I call it sponge, take your pick.
Cake
-8 egg yolks
-4 egg whites
-1 1/2 c. sugar
-4 tbsp. milk
-1 tsp vanilla
-1 c. flour
-1/2 tsp salt
Mix all the ingredients except egg whites. For this particular recipe, save 2 of the extra 4 egg whites, you will need them.
Beat egg whites to soft peaks, fold in.
Spoon into a paper lined cupcake tray, fill each up about 2/3 full. This recipe will make 12-14 cupcakes.
Bake at 350*F for 14-16 minutes, let cool in the pan about 5 minutes and then transfer to cooling racks.
Prepare butter-cream (find the recipe here), substitute mint extract for vanilla.
Meanwhile with the remaining egg whites, you can make these:
Candy Cane Kisses
For red-and-green-striped kisses, add 2 stripes of green food colouring beside red stripes.
2 egg whites
Pinch cream of tartar
1/4 tsp peppermint extract
1/2 cup granulated sugar
Red paste food colouring
In bowl, beat egg whites with cream of tartar until soft peaks form; beat in peppermint extract. Gradually beat in sugar until stiff, glossy peaks form.
Fit pastry bag with 1/4-inch (5 mm) plain tip. Using small, clean paintbrush or cotton swab, brush inside of bag with 2 stripes of red food colouring opposite each other.
Spoon meringue into bag. Pipe 1-inch (2.5 cm) kisses, about 1 inch apart, onto parchment paper-lined baking sheets. Bake in 200 F oven until dry, about 1.5 hours. Turn off oven; let stand in oven for 30 minutes. Transfer to racks, cool.
Finally -
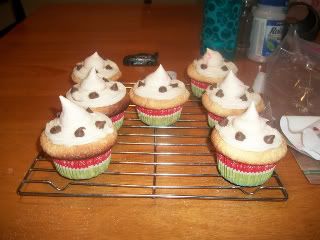
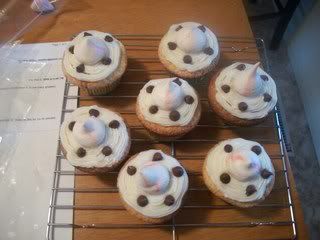
When the cupcakes have cooled, frost them with prepared mint butter-cream. Place one of the candy cane kisses on each one in the center. Garnish with shaved chocolate or chocolate chips if you want, I used chocolate chips on these...
And this is how they turned out:
Yes my table is always a mess when I'm done. They did turn out very well, they were a bit of work (and my piping leaves something to be desired, or my kisses would've been prettier), but I think worth the work and overall a good dessert.
Friday, March 4, 2011
"Give me the cupcake and nobody gets hurt..."
Woman goes 'ballistic' over lack of cupcakes
A woman in South Wales ravaged a bakery upon learning they were out of her favourite cupcakes, according to British media reports.
The shop's owner, Sally Dodd, 43, told the U.K. Daily Mail the woman threw herself on the floor "ranting and raving" when she found out they were out of the popular "sweet tooth fairy" cupcakes.
"The woman went absolutely ballistic when she was told we didn't have the cupcake flavour she wanted," Dodd told the British tabloid. "She didn't even wait for us to tell her that if she waited we could bake some fresh cupcakes for her."
The woman reportedly ran around the counter, grabbed Dodd by the hair, and proceeded to smash all the glass display units, causing more than in $600 damage.
"You expect a certain amount of risk running a bar or a pub but not in a cupcake shop," said Dodd.
Police are hoping video surveillance footage will help them find the culprit.
Linksies
Okay, the first thought I had upon reading this was, "Jackie was in South Wales? I didn't even know..." which I say, of course, solely for Jackie's benefit because nobody else knows who she is. But she is my bestest friend and fellow sugar freak, so best be respectin'.
Honestly though, how bizarre. It reminds me a bit of the old "What would you do for a Klondike Bar" ads, I mean, Man with mic: "What would YOU do for this cupcake?" Lady (while foaming a little at the mouth): "Sir, I would physically attack a baker and smash her displays..."
Wow. People.
Make cupcakes, not war! And not war over cupcakes, or even physical assault raps over cupcakes! Hello!! I'm all for promoting peace and happiness through cake.
Apple Cake
My youngest boy (I really can't say baby anymore, sigh) is an apple fiend. I mean, he can eat 5 or 6 a day if I let him. Nothing makes him happier than when he says "Can I have a snack?" and I say "Go get an apple." So I should've seen this coming. He insisted on an apple cake. Not a cake shaped like an apple, a cake that tastes like apple. And I was determined to give it to him.
When I scoured the web, I found one of two things. Either a) cakes shaped like apples, or b) apple coffee cakes. Nothing suitable for decorating, to be sure. So I had to make up a recipe, or rather, tweak a recipe a bit, to get some apple flavour in there and I have to say it was a huge hit. Everyone loved it, especially the birthday boy. When I asked him if he liked it, he squealed "It tastes like APPLE!"
And so, I'm going to pass on the recipe for anyone else who wants to use it.
Apple Cake
2 1/4 cups cake flour (all purpose can be used, I didn't have cake flour)
1 cup sugar
1/2 cup powdered apple cider mix (or 3 individual pouches)
3/4 cup shortening
3/4 cup milk
3 eggs
2 1/2 tsp baking powder
1 tsp salt
1 tsp vanilla extract
1/2 tsp rum extract (or 1 tsp rum)
Butter-cream frosting
Apple jelly
Preheat oven to 375*F. Prepare pans; first grease and then flour two 9-inch round cake pans.
Into a large mixing bowl, measure all ingredients except frosting and jelly.
With mixer at low speed, beat until well mixed, scraping bowl with a rubber spatula. Increase speed to medium; beat 5 minutes, occasionally scraping the bowl.
Pour batter into prepared cake pans, smoothing the top with rubber spatula. Cut through the batter with a knife to remove any air bubbles.
Bake layers for 25 minutes or until toothpick inserted deep into the center comes out clean.
Cool in pans on wire racks for 10 minutes, then remove from pans and cool completely on racks.
Butter-Cream Frosting
1 16-ounce package confectioner's sugar
6 tbsp butter or margerine, softened (I find butter works better)
3 to 4 tbsp milk or half-and-half
1 1/2 tsp vanilla extract
1/8 tsp salt
Note - I often use salted butter even though it's not called for, and then I don't add any extra salt. I also don't use this recipe, or any recipe, but my method is not precise so I figured I'd dig one up for this purpose.
In a large bowl with a spoon or with a mixer at medium speed, beat all ingredients until very smooth, adding more milk as necessary to make the icing a good spreading consistancy.
Extra note - if you are using a mixer, add the sugar to the wet ingredients slowly. If you put a mixer into a bowl full of an entire package of powdered sugar, there will be a powder explosion.
So - once the cakes are cool, cut and level as needed. Spread a thin layer of butter-cream over the top of each layer. Cover this with 3 or 4 tbsp of apple jelly on the bottom layer, then invert the other layer so that the jelly is sandwiched in between the butter-cream. The remaining frosting can be used to cover and decorate.
On my cake, I used fondant so I used the butter-cream for a crumb layer, then covered in fondant, then used a bit of buttercream for decorating. In that sort of instance you would defininately not need as much as the recipe calls for, but this does keep fairly well in the fridge for a week or two if you plan to bake again.
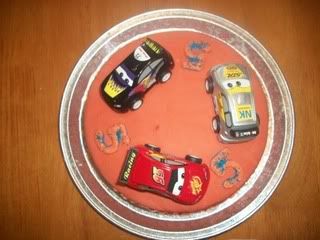
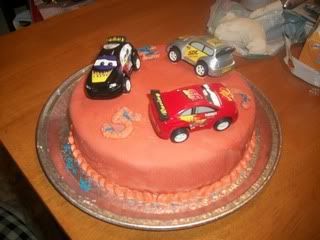
This is how my cake turned out:
I wish I'd thought to get pictures of the inside once it was cut. C'est la vie, next time.
Thursday, March 3, 2011
Cupcakezilla!
I've got a fever. And the only prescription is: more cowbell. I mean, no, no no. I have to write about this cake pan and be done with it. Anyone close to me probably knows already what I'm talking about.
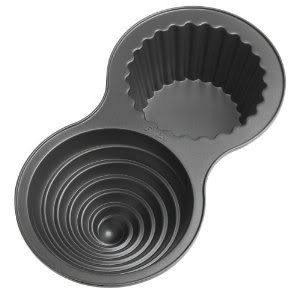
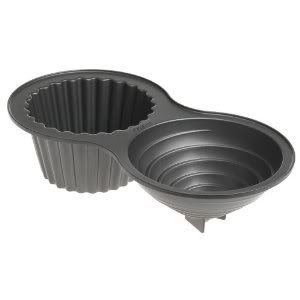
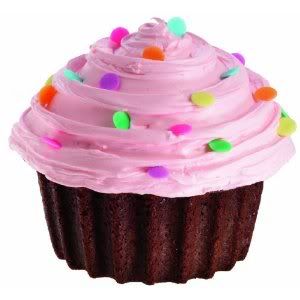
It is: The cupcake shaped cake. It's like a phenomenal bundle of irony. Cupcakes are meant to be individual-sized cakes, and yet, here you can make a *large* cake, shaped like a *mini* cake. *squeals of joy*
Check it.
Okay, okay, that cupcake looks like normal cupcake size on the screen. Trust me, it is not. Unfortunately, as much as I would love to have made this myself, I don't have this pan in my possession yet. But when I do... oh boy.
Now that that's out of my system... *phew*
I figured I could tie this whole post together with something pertaining to oxymoron baking, but unfortunately all I could find were things with titles like "10 Most Disturbing Cakes" and one of them had dead baby rats on it. I'll spare you.
Though I was amused by this title: "Delicious Fruitcake: Oxymoron, or Attainable Goal?"
TRIVIA!
While we're talking about paradoxically large "cupcakes", how about the worlds largest cupcake to date. On October 3, 2009, Laurie Braden achieved the worlds largest cupcake (according to this). This monstrosity of baked goodness weighed in at 596.47 kg (1315.2 lb)! I'm only sad I wasn't around to eat it, though since I missed out, I'd like to think it tasted awful. Sour grapes.
Tune in next time to find out the meaning of existance, how you can win a million dollars from me, and also, how much I lie about what's coming next.
END.
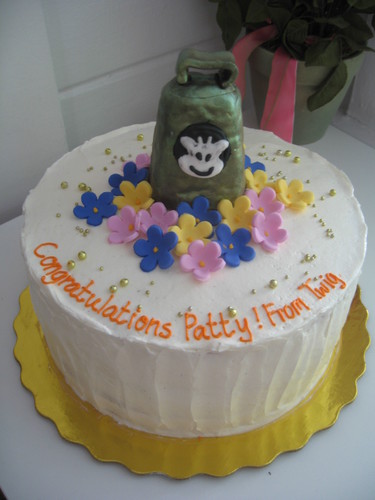
Note: I thought that having made a cowbell reference it'd be prudent to find a cowbell cake. I was sadly disappointed, and this was the best I could dig up:
Oh well. I tried.
Wednesday, March 2, 2011
Blog-o-licious
Off the top of my head, I can think of a few:
-Sugar
-Caffeine
-Pastry
-Sugar
-Food
-World Peace
-Sugar
-Baking
-Chocolate
-Donuts
-Cookies
-Sugar
For the record, if the blog name doesn't tip you off, I'm all about the sugar here. It's my passion and hobby. I love to cook, I love to bake. And I intend to dedicate this blog to anything and everything to do with, well, anything to do with all of this tasty goodness. I do indeed play favourites, my real obsession is cupcakes and the idea for this blog surrounded that, but then I thought - I have enough love in my heart for cookies too, or donuts, or candy... we can all get along!
Primarily cakes/cupcakes here. Ideas, themes, pictures, great ones, bad ones, recipes, tips, tricks, pans, liners, you name it, I will attempt to be on top of it.
N-JOY!
